-

How To Make An Omelette Using The Perfect Omelette Pan

Making the perfect omelette is an acquired talent. If you’ve ever tried and failed, then you know how temperamental the process can be.
Success depends on the quality of the eggs, just the right amount of filling, the proper cooking temperature, and most importantly, your equipment. That’s a lot of variables for such a simple dish.
The good news is that with the right pan for the job, the rest of the details can be a little more forgiving.
Click Here to View de Buyer’s Collection of Crepe and Tortilla Pans!
An Omelette Pan: Why It Matters
Using the right pan for the job is fundamental if you want to ace your omelette preparation skills. What’s so important about using an omelette pan?
Well for starters, when it comes to omelette-making, circumference matters. This controls the dimensions and ensures consistency, making sure the final product isn’t too thick or too thin.
The sides are also an important feature. Your pan needs to allow the thin layer of egg to slide effortlessly off of the surface. The right edge height and a rounded rim will ensure that transferring the omelette to your plate is a breeze.
Features of the Perfect Omelette Pan
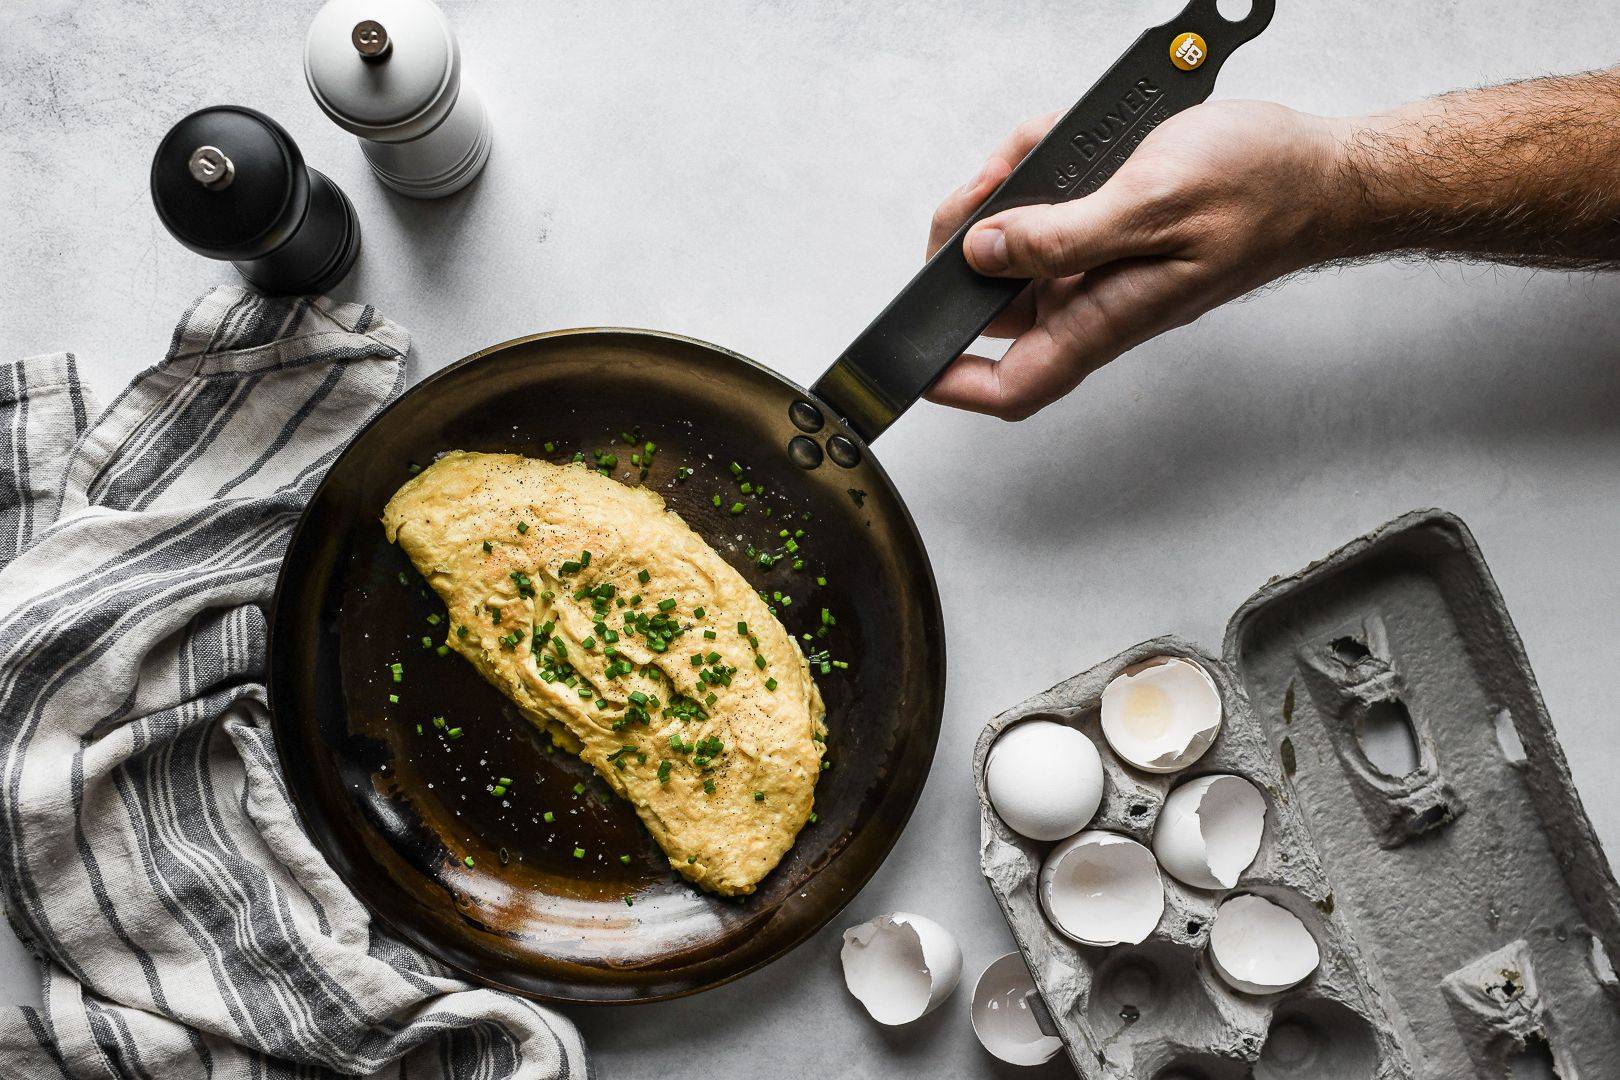
The signature feature of an omelette pan is its edge. It has smooth, rounded sides that allow the finished product to roll seamlessly out of the pan and onto your plate.
The rounded sides prevent the hot omelette from losing its shape, ensuring that the delicate bottom layer of the egg doesn’t tear during transfer. If either of those things does happen, then you risk fillings spilling out. That means a not-so-pretty omelette and a messier clean-up.
For the average 2-3 egg omelette, an 8-10” pan side is ideal. Our best-selling MINERAL B Carbon Steel Omelette Pan comes in an 8”, perfect if you prefer a thicker, American-style omelette, a 9.5” for a thinner, more delicate French-style omelette, and an 11” if you’re cooking a larger quantity with more eggs.
If you prefer to skip the seasoning process and want a naturally non-stick surface, the MINERAL B PRO Carbon Steel Omelette Pan is ready to go from day one.
Related: How to Season a Carbon Steel Pan
How to Make An Omelette
How Many Eggs to Use?
The perfect omelette starts with the right consistency, and that means using the appropriate number of eggs. As we mentioned earlier, 2-3 eggs per omelette is the norm.
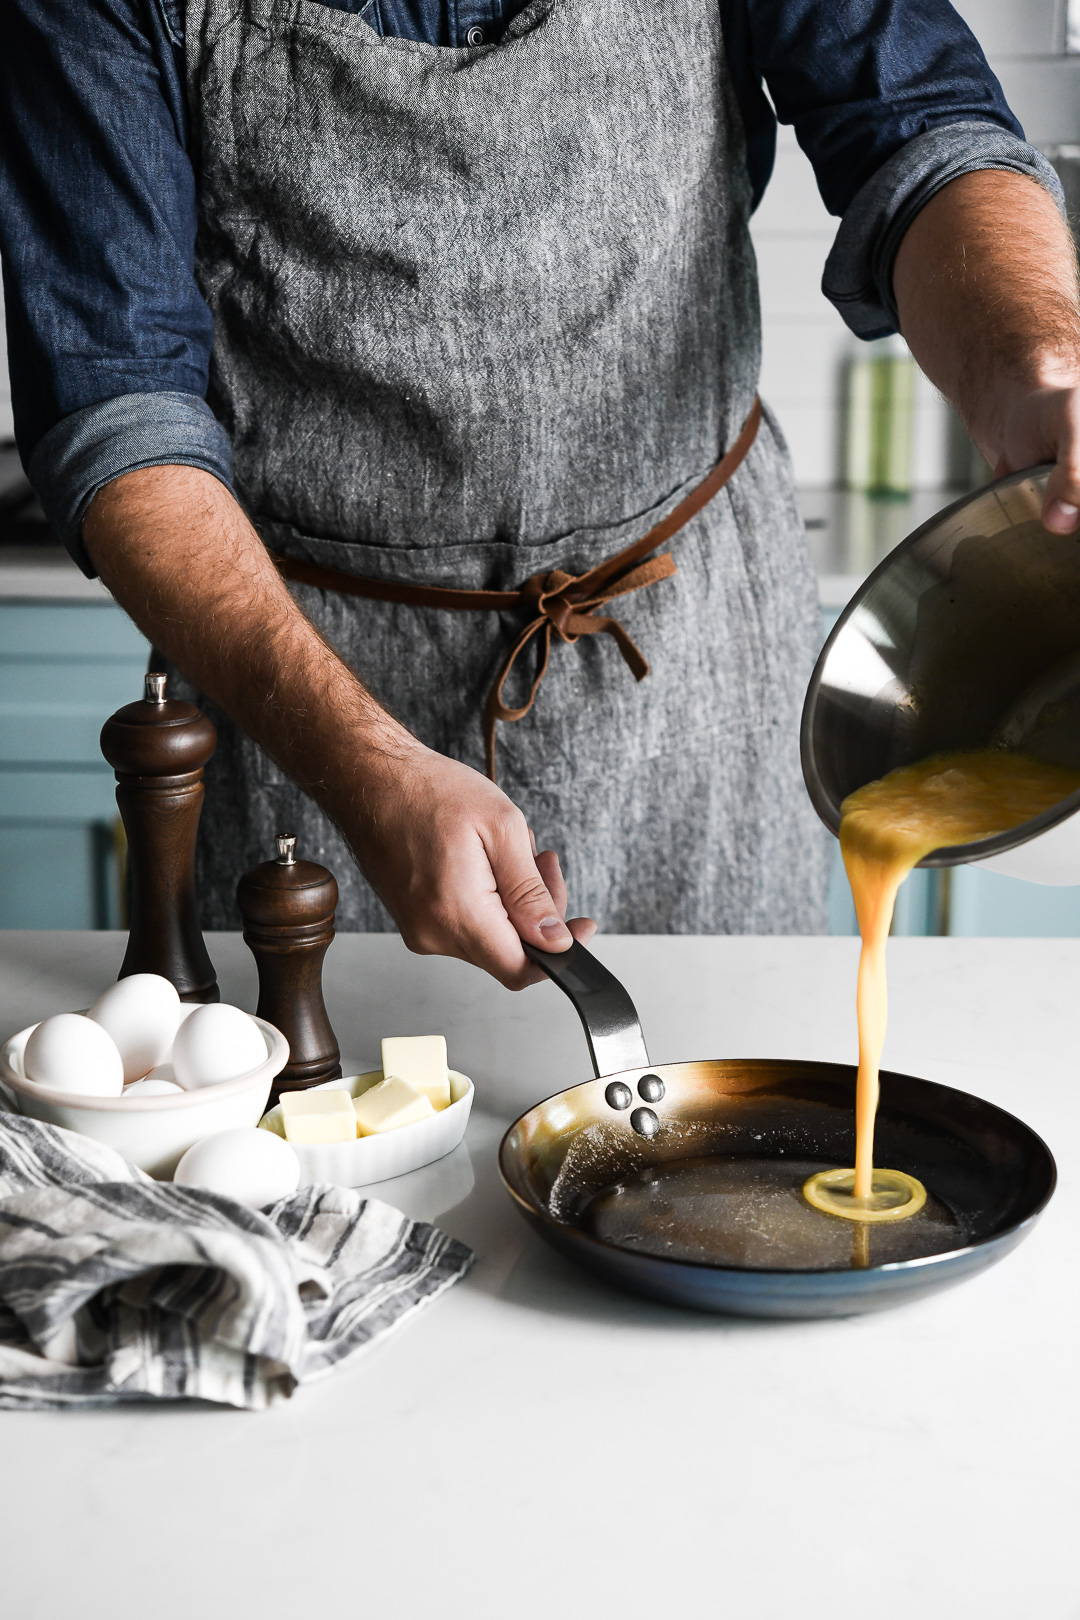
Start with eggs that are at room temperature, as this ensures that they cook properly. Crack your eggs into a small bowl and whisk briskly until there’s no more separation between the whites and yolks.
Once it has been blended into a uniform golden yellow, add about ⅛ teaspoon of sea salt. Whisk a few more times until the salt is evenly distributed.
Step 1: Heating Your Pan
The perfect omelette is made low and slow, gently solidifying the liquids but being careful to not overcook them.
Set the heat to medium low and add 1 tablespoon of unsalted butter to the pan. Once the butter is melted, use a spatula to coat the full surface area of the bottom of the pan.
Step 2: Cooking the Omelette
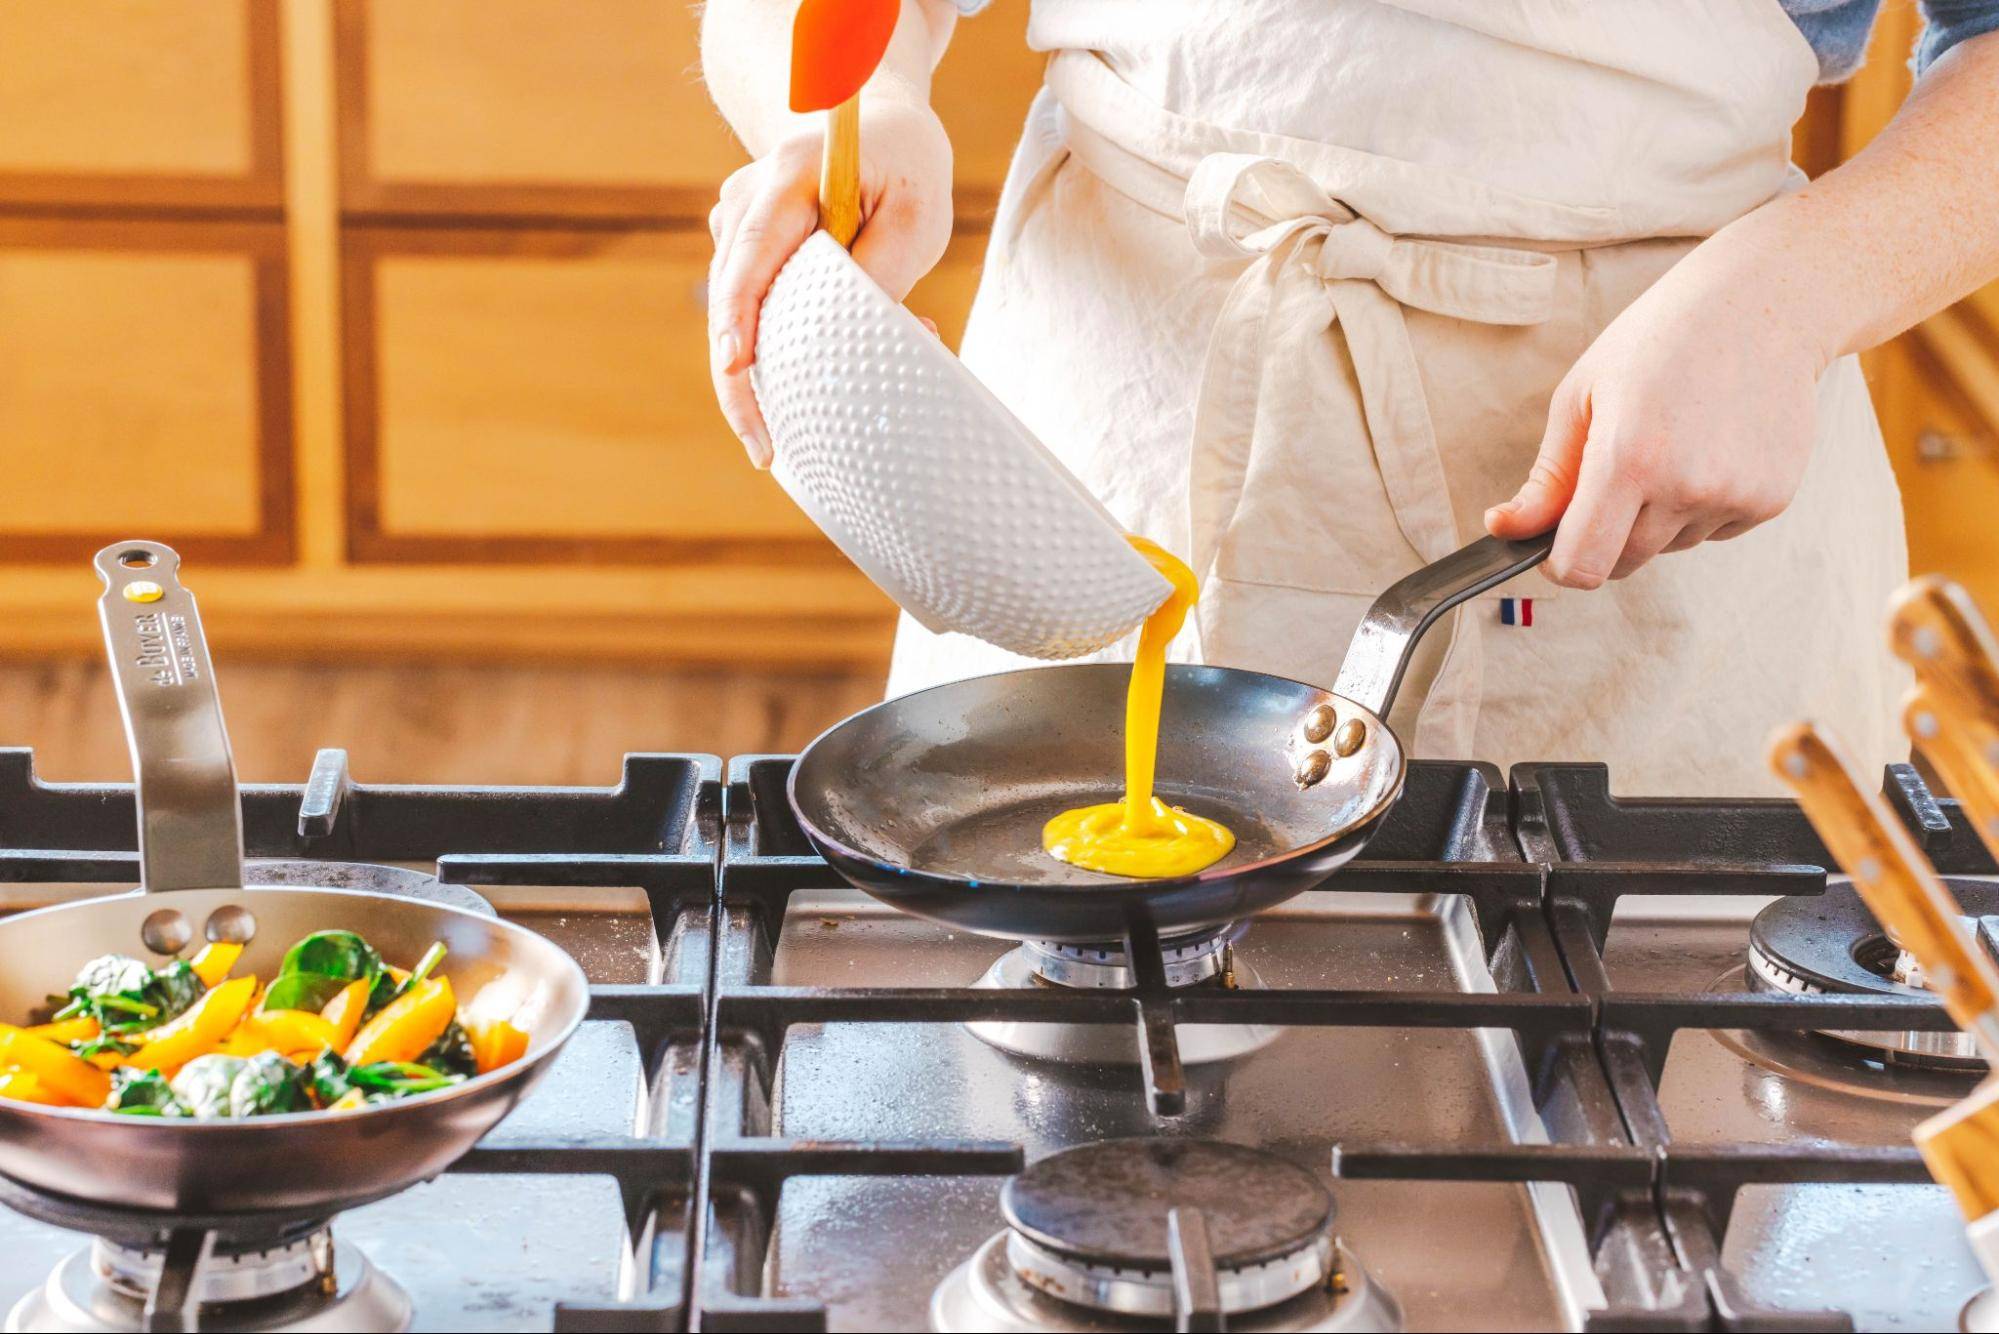
Gently pour the egg and salt mixture into the pan, moving it around until the surface has been covered. You’ll want to keep moving the eggs in the pan with a spatula.
When you start to notice some solidification, leave it to cook until the middle no longer appears liquid-like, but isn’t yet completely solid.
Step 3: Omelette Fillers
When thinking about all of the delicious options for filling, the first thing you should consider is timing. Whatever cheese you select will melt quickly.
But because omelettes have such a short cooking time, uncooked fillings aren’t really suited for omelette making. If you want to use anything raw, like ham or bacon, those items will need to be cooked in advance.
A simple French-style omelette that doesn’t overdo it on fillings allows the uneven, wrinkled texture to shine. Cheese, fresh herbs, and a crack of freshly ground pepper are often all you need.
Other great options are sharp cheddar and crunchy bits of crumbled bacon, or crème fraîche and shredded hot smoked salmon.
When selecting fillings, keep in mind that you don’t want to add any additional moisture. So be sure to cook down any greens or other ingredients that might contain water beforehand.
You won’t need more than a small palmful of each ingredient, and they should be spread evenly across the surface of the omelette.
Click Here to View deBuyer’s Collection of Specialty Pans!
Step 4: Folding Your Omelette
Using a heat-safe spatula, gently move the silicone under the omelette from each side. This allows it to loosen from the pan before you attempt the fold.
Now it’s time to decide whether you want to make a traditional, American-style half-moon omelette or a rectangular tri-fold omelette. The tri-fold is a bit easier, and it can be your plan B if the half-fold fails.
With your spatula in one hand and the panhandle in the other, place the silicone under the side you want to fold. As you lift, use the help of gravity to scoot the other half of the omelette closer to the middle of the pan.
Delicately flip the top over the bottom with your spatula. If it doesn’t go the distance, then you can leave it as is and just flip the other edge of the omelette over the other two-thirds, giving you a tri-fold.
Or Folding Without a Utensil
Folding can also be done without any utensils. This method might take a little practice though, so if you don’t get it right the first time, keep trying. This is really where the right omelette pan comes in handy.
Once your omelette loosened from the surface and is ready to plate, gently scoot it onto your plate until about half of the omelette is plated. Then, starting with the middle of the omelette, allow it to double up on itself, moving it across the plate until you’ve got a half-moon.
Step 5: Serve Your Omelette
To serve, you can keep it simple with a pinch of flakey salt and a crack of pepper. Or, use that naked space to double up on your toppings.
Add an extra sprinkle of cheese, a dollop of crème fraîche, some fresh herbs, a few extra bacon crumbles, or whatever else you like.
Making an Omelette in the Perfect Pan
Every kitchen needs a resident omelette expert who’s uniquely qualified to whip them up perfectly, every time. And with the right pan for the job, that expert could be you!
All it takes is the proper equipment and a few tasty practice sessions, and before you know it, you’ll have unravelled the delicious mystery of making the perfect omelette.